The Properties dialog displays and allows the modification of the parameters of textures and colors. Material properties are accessible by selecting the Material Properties dialog.
Common Properties
|
Name |
Name makes materials easier to find in search. |
|
Category |
Categories and subcategories can be used to sort materials. The number of Categories is fixed, it means you cannot add a new one or delete any existing categories. |
|
Sub category |
You can add new subcategories to any category except the one named In Model. |
|
Producer |
Optionally, in the Producer field you find the Manufacturer of the material. |
|
Replacement color |
Click on it to open the Color dialog. Color libraries are listed on the left. Expand the list by clicking on one of the names. Select a standard color or choose a color using the color picker. The Hue, Luminance, Saturation (HLS), and the Red, Green, Blue (RGB) values display the color components. The Preview displays the selected color. |
|
Color / Texture image |
The color or texture will be displayed in Realistic or Consistent color visual style or in the photorealistic view. |
Physical Properties
|
Position |
With the Stretch option, the program stretches the selected texture on the surface. The mapping size fields are disabled in this case. With the Tile option, the texture repeats on the surface with the specified physical size. |
|
Material mapping horizontal |
Horizontal size of the texture in mm. |
|
Material mapping vertical |
Vertical size of the texture in mm. |
|
Direction |
Texture default direction. |
|
Recalculate UV mapping |
This checkbox forces the "refresh" of UV map with the actual topology. It is useful when you reshape or modify the object geometry and you need to update its visual. |
Appearence - Render Styles
To make the photorealistic image more realistic, it is essential to set the material properties correctly. This is made easier by applying rendering styles. Render styles are optimized groups such as metal, glass, brick, mirror to visualize the associated quality and surface parameters.
Appearence properties are properties that affect the quality of the rendering. The features you can specify and their definitions are the following:
|
Transparency |
Determines the extent of the transparency of the material. |
|
Brightness |
Shows how the material reacts to ambient light. Brightness increases or decreases all color components (red, green, and blue). |
|
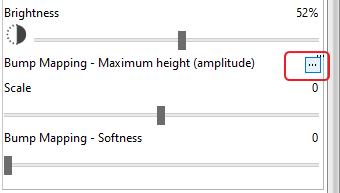
Bump Mapping - Maximum height (amplitude) |
Bump mapping is a texture mapping technique for simulating bumps and wrinkles on the surface of an object. The height of the bumps can be adjusted using this control. |
|
Bump Mapping - softness |
This control is used to set the amount of blur that is applied to the 'bump map' image. |
|
Reflection factor or mirroring |
Shows how the material reflects light from the surrounding objects. |
|
Refraction or IOR |
The Index of Refraction (IOR) specifies the way that light is scattered as it passes through a material. Example: when light comes in contact with water or glass, the light will get slightly bent. |
|
Blurry reflection |
Blurry Reflection generates tiny random bumps on the material surface that makes the reflection like indistinct mirroring. |
|
Blurriness of transparency |
Scale factor from clear transparency to blurry (e.g. frosted glass). |
More about using Bump Mapping
For textured materials, if the amplitude is other than 0, the normal map is automatically created, creating the illusion of a bump mapping.


Normal Map
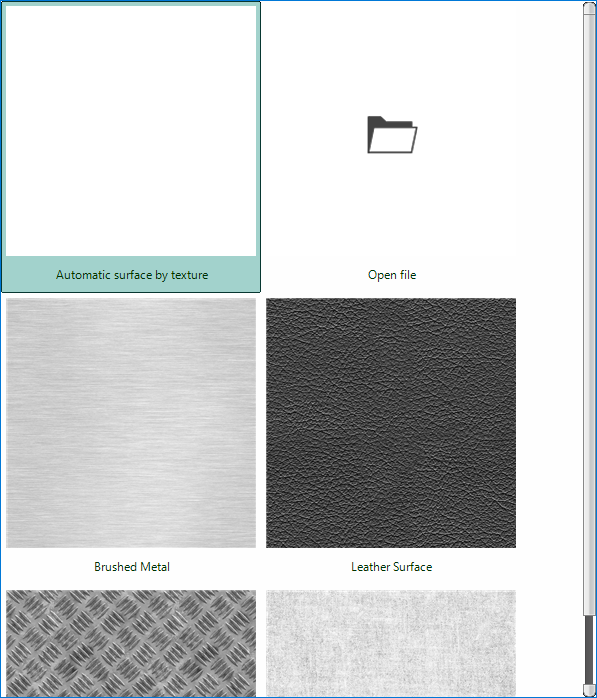
Normal Map is a special kind of texture that allow you to add surface detail such as bumps, grooves, and scratches. Normal Map can also be used on textured material or on color-specified material. The built-in Normal Map files can be selected from the following list:


Create your own Normal map image
Normal map images can be downloaded from the web, or you can create your own based on a specific texture. If you are searching on the web, you may type “normal map” into the search engine and select the images. You should search and download a pattern in jpg or png format.
Here's how to create your own Normal Map texture:
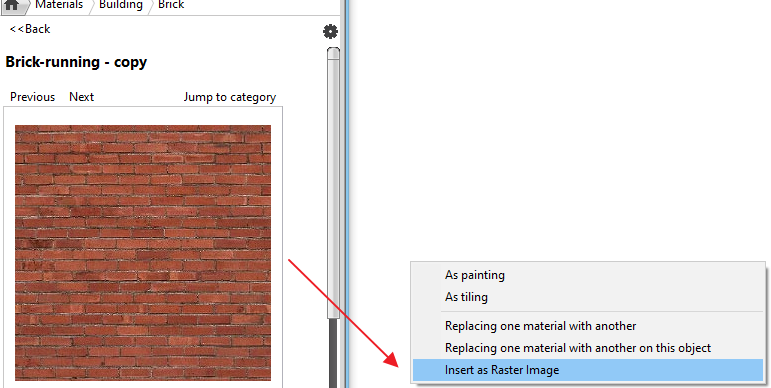
- Place an image on the floor plan. This can be e.g. a material from the material library that you place as a raster image.

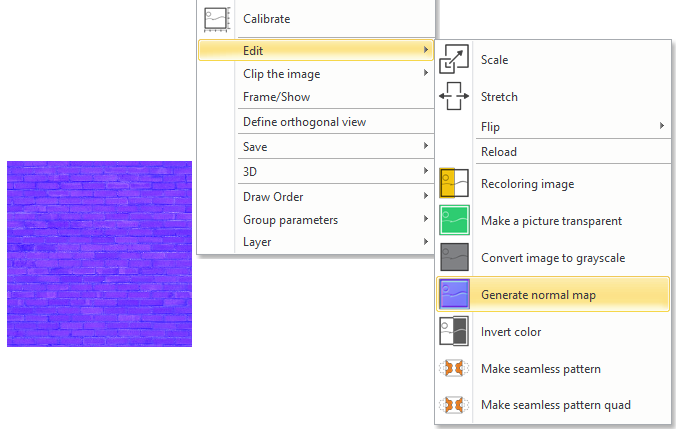
- Select the Generate normal map command from the context menu of the placed image. The image will then turn into the blue color of the normal map textures.

- Save it as an image file.
How to assign a downloaded or created Normal map to the material:
- In the property of the selected material, click on the file entry for Surface roughness (indicated by 3 dots),
- Then open the File dialog.
- Select the normal map.
In the example below, we assigned the skin type normal map to a light RAL color. The bump mapping effect can be made stronger by increasing the Amplitude factor.
In the following example, we assign a normal map to a wallpaper:
Original:

With Normal map

Comments
0 comments
Article is closed for comments.