Cover page creation
In the print queue dialog it is possible to add an automatically generated cover page to the print queue. This cover page is generated from an RTF template. Read more about RTF templates in the RTF list article.
Cover page sample:
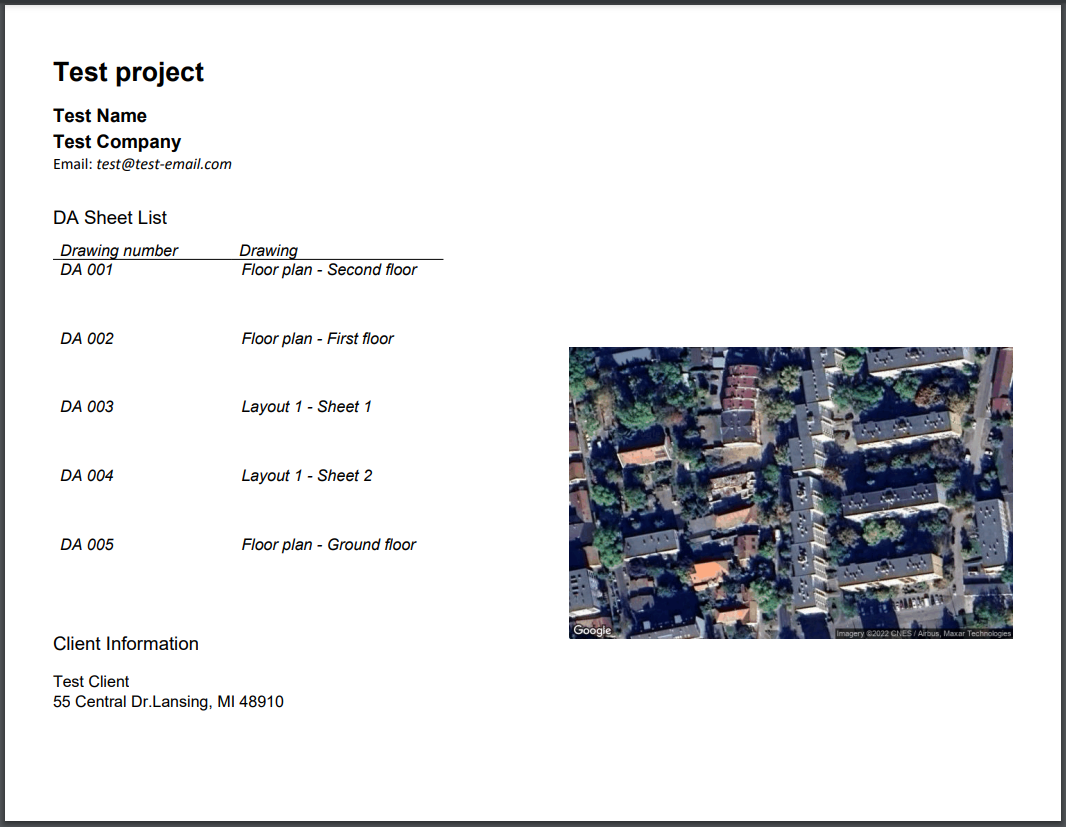
To add a cover page follow these steps:
- In the print queue dialog check the "Create a cover page" checkbox.
- Select an existing RTF template with the "Browse" button. The ARCHLine.XP installer comes with some pre-assembled templates that can be found in the "Documents/ARCHlineXP Draw/../RTF" folder but you can also create custom templates (see the "Custom template creation" paragraph).
- Set the values of the project parameters that the RTF template contains with the help of the "Parameters" button.
- Use the "Preview" button to check if the template can be loaded and the cover page can be generated successfully. The template cannot be loaded when it is opened in another program such as Microsoft Word.
- Print the print queue.
If you chose PDF print, the result will be a single PDF file with an extra cover page in the front.
All the merge fields in the RTF template will be replaced by the referenced value of the parameters. If a parameter was not found or it's value was empty the whole field will be removed totally from the final result.
Custom template creation (in Microsoft Word)
- Modify an existing template
Merge field can be copied and the parameters that they reference can be changed.
- Right click on the merge field.
- Edit field...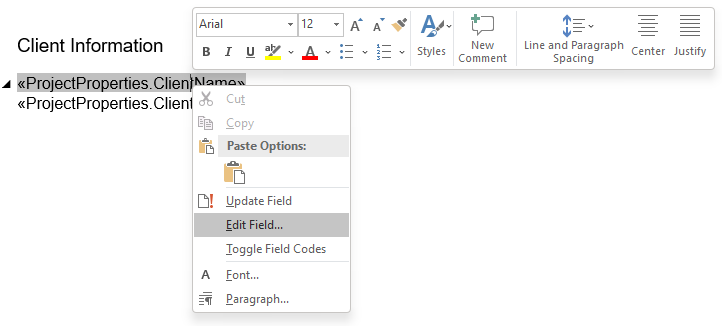
- Change the field name to a valid property name. (See below the "Valid properties" paragraph for a complete list.)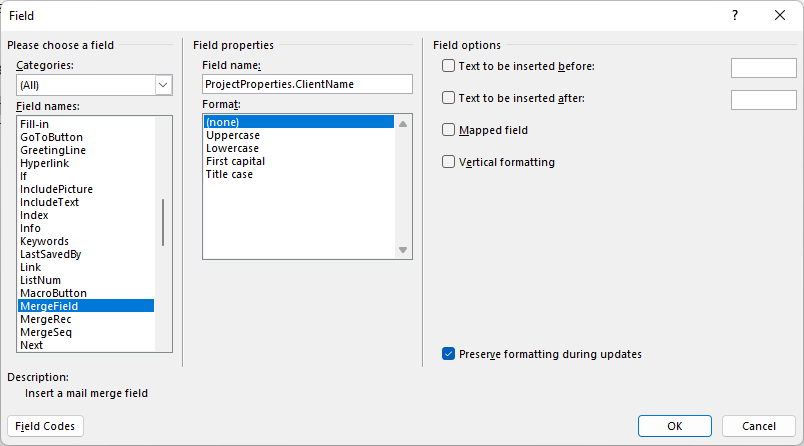
- Save the changes with the "OK" button.
Modify the layout and the style of the template and save it. - Create a new template from a blank document
- On the "Mailings" tab select the "Select recipients/Type a new list..." option to specify a new data source. If the mailing tab is hidden you have to enable it first by choosing the "Customize the ribbon" option after a right click on the ribbon menu.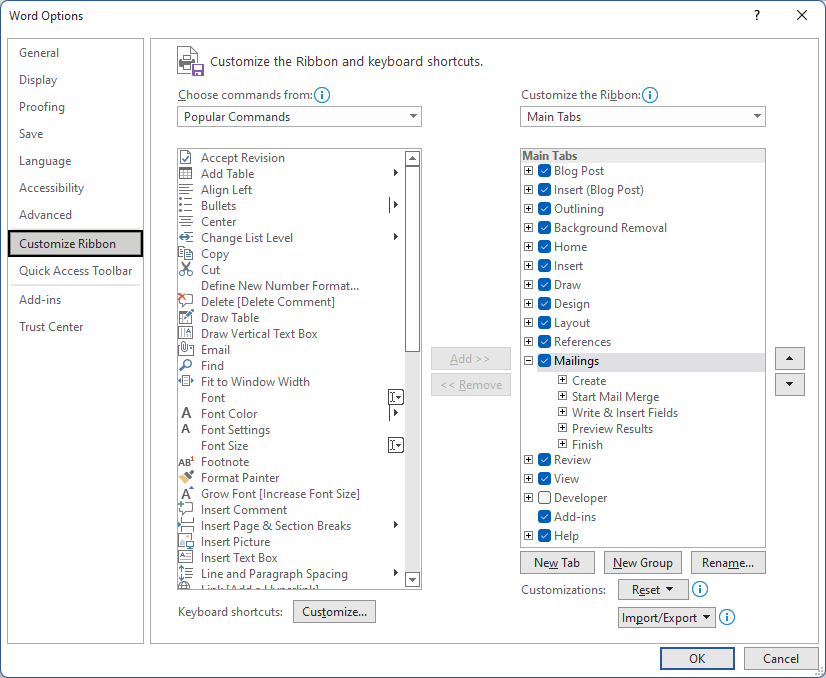
- In the "Customize Columns" dialog delete the default values and add valid property names. (See below the "Valid properties" paragraph for a complete list.)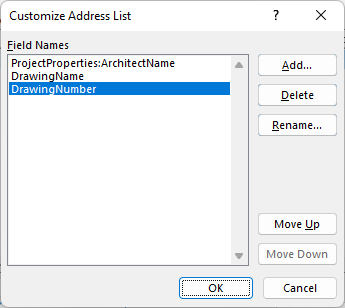
- Close the dialogs and save the data source file that Word generates. You can reuse these data sources later for other templates.
- Create the layout and the style of the template and insert merge fields where you want to reference properties.
Valid properties
These are the properties that can be referenced by print queue RTF template merge fields. If you generate templates with Microsoft Word the "<<" and ">>" characters do not have to be included in the name. Word will generate these when you create a merge field.
- Properties for print queue items
Every property has to be placed between the <<RangeStart:PrintQueueData>> and the <<RangeEnd:PrintQueueData>> merge fields. The program will duplicate everything between these tags multiple times based on the number of print queue items.
<<DrawingName>>: The name of the drawing in the queue. Can be changed in the print queue dialog.
<<DrawingNumber>>: The unique identifier of the drawing in the queue. Can be found next to the drawing name.
<<PageNumber>>: The number of the page that the drawing will be displayed on. Generated automatically. Cannot be edited manually.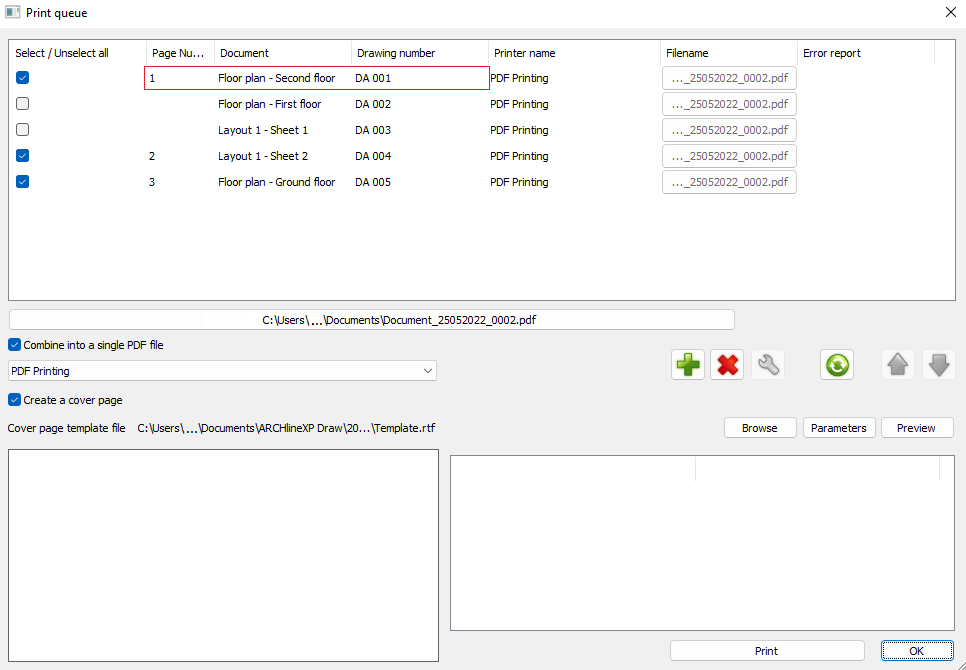
- Project properties
Every project property can be referenced anywhere in the document (even inside or outside the <<RangeStart:PrintQueueData>> and the <<RangeEnd:PrintQueueData>> tag pair) but must have the "ProjectProperties:" prefix. Most of the values of these properties can be updated in the "Project properties" dialog that can be opened from the print queue dialog or the ribbon menu (File/BIM/Project parameters).
General properties
<<ProjectProperties:ProjectPhase>>: The active phase filter.
<<ProjectProperties:Nord_direction>>: The north direction value. Can be changed in the ribbon menu (View/Sun/North direction).
<<ProjectProperties:ModelLunit>>: The actual length unit.
<<ProjectProperties:ProductName>>: The name of the running ARCHLine.XP instance.
<<ProjectProperties:ProductVersion>>: The actual version of the running ARCHLine.XP instance.
Building information
<<ProjectProperties:BuildingType>>: The type of the building.
<<ProjectProperties:ProjName>>: The full path of the project (.pro) file. (Generated automatically. Cannot be changed manually.)
<<ProjectProperties:ProjShortName>>: The unique name of the project.
<<ProjectProperties:BeginDate>>: The date when the project was created.
<<ProjectProperties:EndDate>>: The date when the project was finished.
<<ProjectProperties:ProjectNumber>>: The version of the project.
<<ProjectProperties:BuildingName>>: The name of the building.
<<ProjectProperties:GrossArea>>: The total area of the building site.
<<ProjectProperties:Area_available_for_Building>>: The buildable area.
<<ProjectProperties:Maximum_height_of_the_Building>>: The maximum height of the building.
<<ProjectProperties:Height_above_the_sea>>: Building elevation above sea level (in meters).
Location information
<<ProjectProperties:Region>>: The specified region.
<<ProjectProperties:Country>>: The specified country.
<<ProjectProperties:Town>>: The specified town.
Client information
<<ProjectProperties:ClientName>>: The name of the client.
<<ProjectProperties:ClientAddress>>: The address of the client.
Architect information
<<ProjectProperties:ArchitectName>>: The name of the architect.
<<ProjectProperties:ArchitectCompanyName>>: The company name of the architect.
<<ProjectProperties:ArchitectAddress>>: The address of the architect.
<<ProjectProperties:ArchitectEmail>>: The email address of the architect.
Other
<<ProjectProperties:Date>>: The creation date.
Unique parameters
In the "Project properties" dialog you can add custom parameters with unique names and values. These values can also be referenced in the print queue RTF templates by using the "ProjectProperties:UserParams:" prefix. For example:
<<ProjectProperties:UserParams:CustomParam1>>: The value of the "CustomParam1" parameter that was added in the "Project properties" dialog.
Comments
0 comments
Article is closed for comments.